I can't sleep, so I am writing a tutorial.
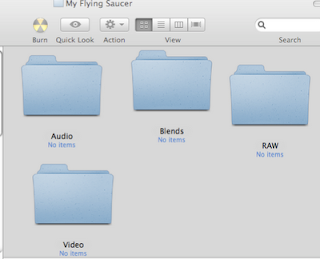
Create a project folder and name it. Go into it then create four more:

Set up two 3D viewports, put one in top, orthographic view. Do this by clicking View>Top, or on a full keyboard use the numpad keys 5 and 7.
Now use Shift-A to add a mesh circle, accept at 32 vertices. Go into this objects edit mode with TAB. Use A once or twice to get all verts deselected, then use B to box select all the verts on the left of the centerline. Once these verts are selected, delete them with X > ENTER.
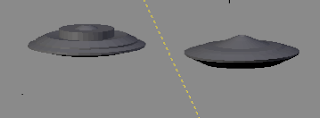
Check out every detail of Pic 2 a moment. Its in Top Ortho view, and you can see at the bttom that from this view the y axis is 'up down' and the x axis is 'left right'. Save your file quickly with CTRL-W. Put it in the 'blends' folder you created. Now notice in Pic 2 the big yellow dot. This is the circle objects pivot point. If you select the circle, or all the verts in edit mode, then hit R, it will all rotate around that. Around the yellow dot is the cursor, which functions just like a cursor does in a word processor. You put it where you want to create new objects.
Undo any rotations with CTRL-Z or reload the file you just saved File > Open Recent.
In the buttons window, editing panel, add a modifier or the type: Mirror. Enable 'Do Clipping'
Flip between Object and Edit mode a few times with TAB. Move a vert in edit mode, then try Object mode to see what happens. Undo or reload to return again to the circle. Mirror mode enables you to model one half of a symmetrical object, and have the mirrored half follow along by itself. It's mostly used in character animation, but we have one here as well.
In edit mode:
Change the objects pivot from median point, to 3d Cursor, then hit A to select all verts, click 'only edges', then hit S to scale the verts/edges inwards as in Pic 4.
Next tilt the 3D viewport a bit, and move the inner loop of verts up a bit. You can either drag the blue arrow up, or use G, Z, Drag, ENTER.
Now repeat the process of extruding, constraining to axis (X,Y,Z) translating with G and scaling with S to give your saucer a better shape.
Don't forget to use two 3D viewports. Tilt one around, and keep the other in Orthogonal top, front or side view.
Save your file.
Now experiment with the tools we've use so far.
This is where your saucer can and should start to look a bit different to my one.
Bear in mind that scaling is done around the cursor, as it is currently set so you might find scaling verts also drags them down in the z axis towards the cursor. This can be undesirable so select only the top and bottom verts, then snap the cursor to a point between them with Shift-S > cursor to selection
You can select the outer loop of verts with alt-select to extrude that. Note: if you use the Gnome Desktop Manager then alt-select may not work. Instead, select two of the verts in the loop you want to select, then hit CTRL-E > Edge Loop Select.
You can seal the hole by selecting the two verts at the tope and bottom of it, snaping the cursor there with Shift-S > Cursor to Selection, then extruding with E, and merging the verts with W Merge > At cursor.
One useful trick here is to hit TAB to get the Saucers Object mode, then hit Shift-D then Z, drag, enter. This will duplicate, and drag across a copy which you can then experiment on alongside the original.
One basic setting is set smooth/set solid. This is a toggle between a basic smooth look, and a basically chunky, solid one. There are buttons in the edit panel, under link and materials. Another way to swap between them is in edit mode with the W menu > Set Smooth OR W > Set Solid.
The reason I mention this now is it also brings to the fore a common problem. If set smooth makes the model look ugly, you probably have a 'normals' problem. Go into edit mode, select all verts with A, then hit CTRL-N > Recalculate Normals. I advise that you keep modelling for a while, and delay researching normals further for now. Once you know this technique, that is adequate knowledge about normals for now.
Try to make sure you close both the top and the bottom of your saucer.
Don't forget to give your saucers objects a material each, and a decent name. To rename one, select it, then hit N. Click in the text field where it says Circle, or Circle.001 and type 'Saucer' or something descriptive.
When you feel 'done' change the pivot type back to median before you save your file, as this is the 'norm', and the best way to leave it.
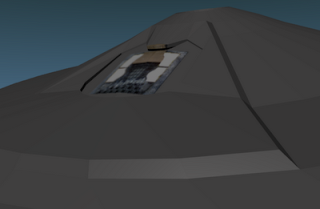
One final tip. Lets indent a panel, or make a hatch. Select a saucer, hit Alt-Tab to and select Faces. Now you select whole faces in edit mode, rather than verts or edges. Select a face, then hit E to extrude it, and accept immediately, without moving it around. Now use S to scale it in a little.
Now change the transform orientation to 'Normal' as below, or with Alt-Space > Normal.
Now extrude again, but this time drag it down and/or into he ship, as in pic.
Notice how this makes two indented panels/hatches because you are still using a mirror modifier. You can 'apply' the mirror modifier if you wish, to get rid of it, and make the saucer a single whole mesh.
Adding a decal.
Select an area of the mesh, in faces. Snap the cursor there: Shift-S > Cursor to Selection. Go into object mode, and add an 'Empty' with Shift-A > Add Empty. With this still selected, Shift select the saucer as well, then hit CTRL-P > Make Parent.
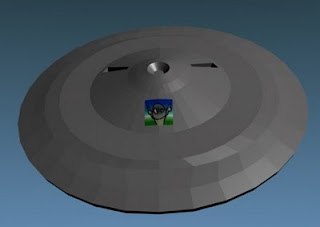
On the saucers shader/material panel, add a texture, choose type image, then CTRL-click LOAD and find a decal image. Make sure you press ClipCube, as in the image.
Now go from the texture buttons back to the materials buttons, and change the Map Input settings. Select Object, and type 'Empty' in the text field there. You may need to change the size settings; you can see I have made them all 10.
The result:
This is a cool technique. In my example, I don't find it all that aesthetically pleasing, so I think it should be changed into a weird alien symbol rather than my 'Happy Avatar', or perhaps...
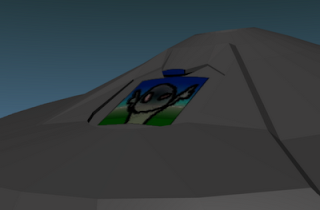
...he needs a window frame...
On second thoughts, he doesn't really belong on this model, so I'll replace the image with a toned down version
Thats all for this part, I must try and sleep. This render has texture spread over the entirety of each model. Music made in Reason 4.
Watch Flying Saucers in Animation | View More Free Videos Online at Veoh.com






No comments:
Post a Comment